Using Custom Views in Excel to Quickly Change Print Ranges
Changing print ranges in Excel is a very manual process – typically one has to either:
- Use the “Page Break Preview” option in the View ribbon and drag the blue boxes around to modify the ranges; or
- Change the ranges in the Sheet tab of the Page Setup dialog box (ALT P, SP).
Wouldn’t it be nice if you could quickly switch between two or more pre-set print ranges to change what is printed or PDF’d? For example, perhaps you have a financial model where you want to quickly switch between printing just the financial statements and then just the backup schedules (where all the information is on the same sheet of the model). Doing this is possible using Excel’s Custom Views feature.
What are Custom Views?
Simply put, Custom Views offer a way to create behind-the-scene “bookmarks” in your Excel file so that you can then quickly navigate to those bookmarks. Suppose you have a model with the following sheets:
- Cover page
- Summary output
- Assumptions
- Scenarios
- Model (contains the financial statements and supporting schedules)
You can use Custom Views to create bookmarks at the top of each sheet. Go to the cell that you want to bookmark (cell A1 for instance) and select View -> Custom Views -> Add:
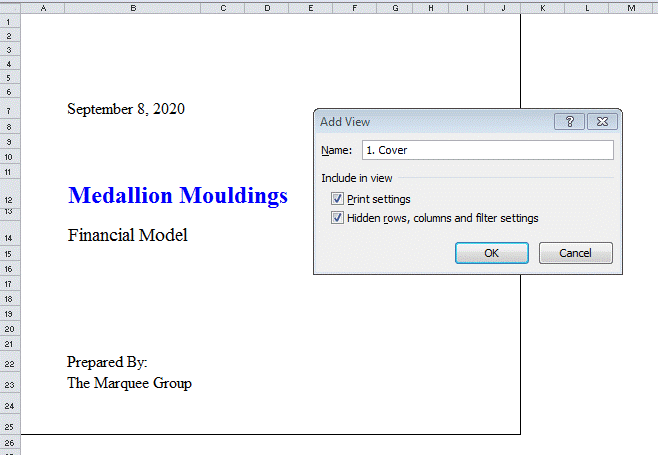
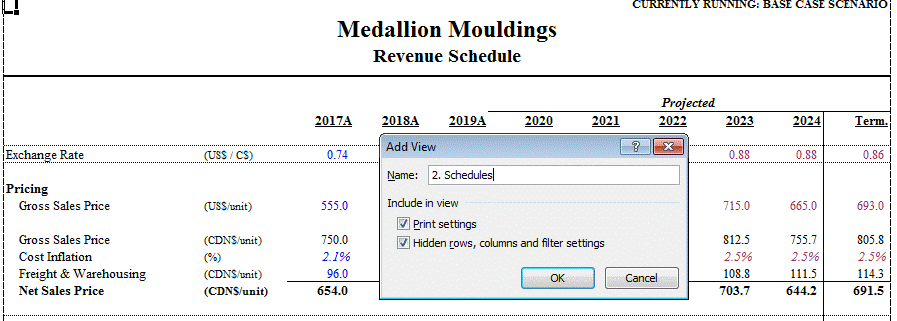
Now type a name for your View. Note in the example above, we put the number 1 in front of the name of the view. This is so that the views will appear in the desired order when we go to Custom Views, as opposed to alphabetical order based on the chosen names. In the screen capture below, we have added views on cell A1 of each of the five sheets in the model:
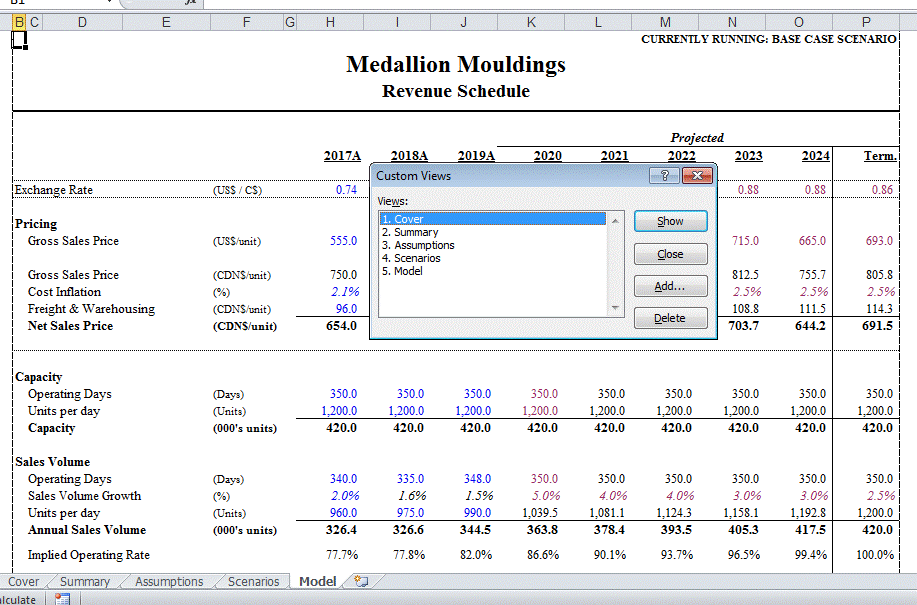
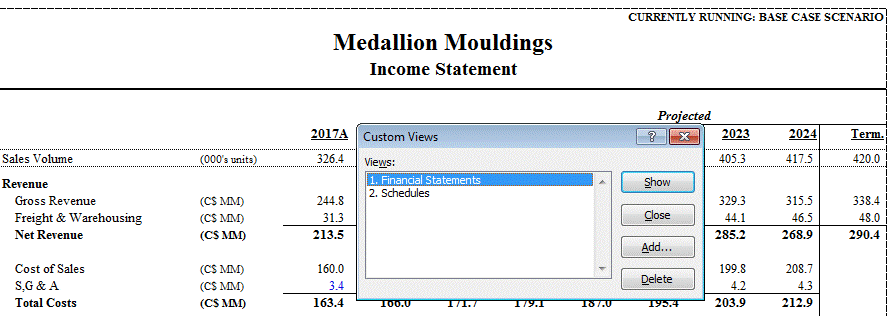
To quickly jump to any of the bookmarks, go to Custom Views (ALT W, C or ALT V, V using legacy Excel shortcuts), select the view you want to jump to and click Enter.
Dynamic Print Ranges with Custom Views:
When you create a Custom View, you may have noticed that there’s an option to include the Print Settings in the view:

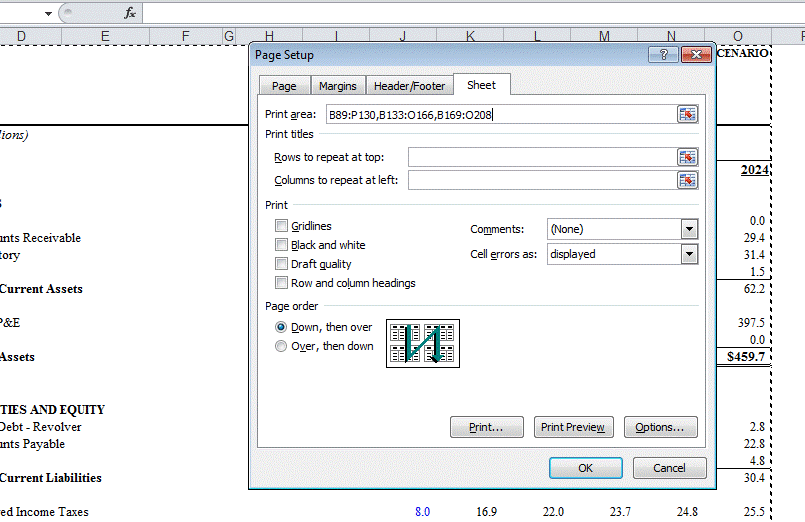
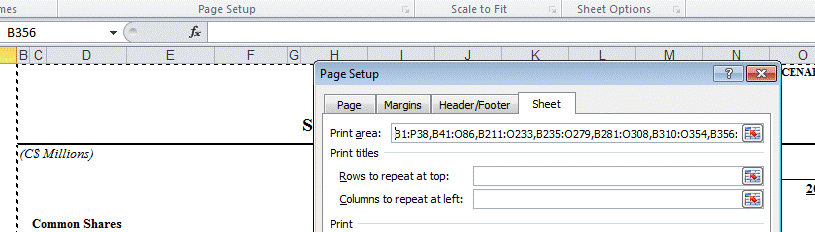
If you select this option, Excel will memorize the print ranges in place when you created the view. Let’s say our Model sheet has the following items in the respective cell ranges:
Financial statements: B89:P130,B133:O166,B169:O208
Supporting schedules: B1:P38,B41:O86,B211:O233,B235:O279,B281:O308,B310:O354,B356:O391
Below are the steps to create two separate views with custom print ranges. For simplicity, we have removed the navigational Custom Views discussed above.
Step 1: Step up the print rages for just the Financial Statements:
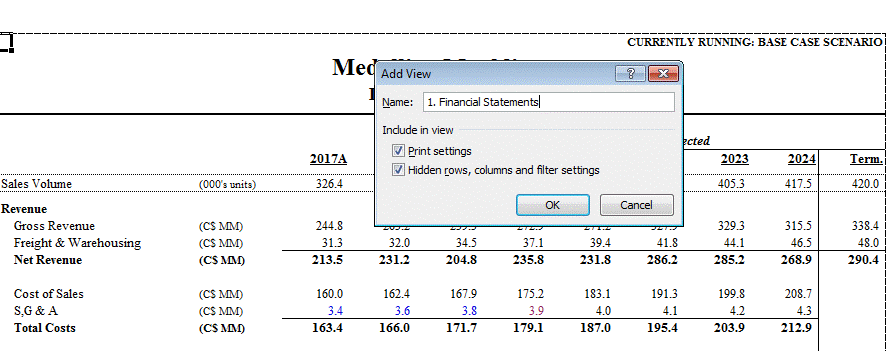
Step 2: Create a Custom View for the financial statements and make sure the Print Settings box is selected:
Step 3: Modify the print ranges to now just include the supporting schedules:
Step 4: Create a second Custom View for the schedules:
Now as you switch between the views, you’ll see that the print ranges revert to those that were in place when you created the view!
There are other ways to create custom print ranges in Excel using VBA. But using Custom Views is a quick and easy way to do this without VBA.